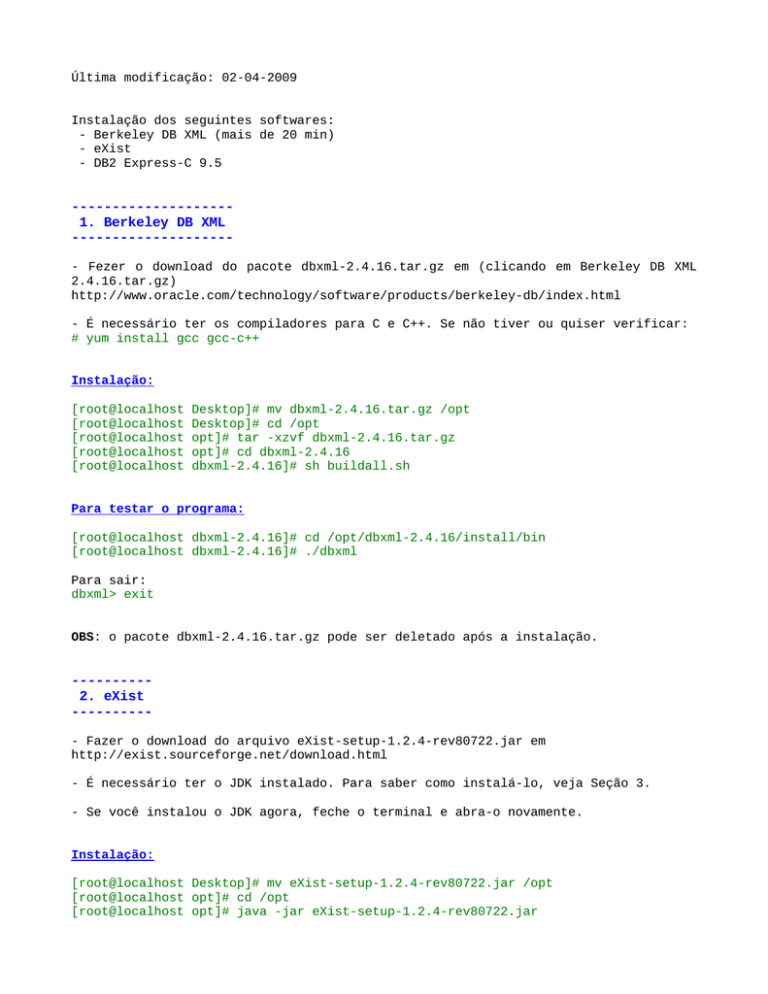
Última modificação: 02-04-2009
Instalação dos seguintes softwares:
- Berkeley DB XML (mais de 20 min)
- eXist
- DB2 Express-C 9.5
-------------------1. Berkeley DB XML
-------------------- Fezer o download do pacote dbxml-2.4.16.tar.gz em (clicando em Berkeley DB XML
2.4.16.tar.gz)
http://www.oracle.com/technology/software/products/berkeley-db/index.html
- É necessário ter os compiladores para C e C++. Se não tiver ou quiser verificar:
# yum install gcc gcc-c++
Instalação:
[root@localhost
[root@localhost
[root@localhost
[root@localhost
[root@localhost
Desktop]# mv dbxml-2.4.16.tar.gz /opt
Desktop]# cd /opt
opt]# tar -xzvf dbxml-2.4.16.tar.gz
opt]# cd dbxml-2.4.16
dbxml-2.4.16]# sh buildall.sh
Para testar o programa:
[root@localhost dbxml-2.4.16]# cd /opt/dbxml-2.4.16/install/bin
[root@localhost dbxml-2.4.16]# ./dbxml
Para sair:
dbxml> exit
OBS: o pacote dbxml-2.4.16.tar.gz pode ser deletado após a instalação.
---------2. eXist
---------- Fazer o download do arquivo eXist-setup-1.2.4-rev80722.jar em
http://exist.sourceforge.net/download.html
- É necessário ter o JDK instalado. Para saber como instalá-lo, veja Seção 3.
- Se você instalou o JDK agora, feche o terminal e abra-o novamente.
Instalação:
[root@localhost Desktop]# mv eXist-setup-1.2.4-rev80722.jar /opt
[root@localhost opt]# cd /opt
[root@localhost opt]# java -jar eXist-setup-1.2.4-rev80722.jar
Uma interface gráfica se abrirá.
1) Tela inicial -> Next
2) Se o jdk está na pasta padrão, ele reconhecerá automaticamente e esta tela não
será exibida. Caso apareça esta tela, indique o local de instalação do jdk.
3) Select the installation path: /opt/eXist -> Next
4) Select the packs you want to install: todos -> Next
5) Instalação -> Next
6) Setup Shortcuts -> selecione Create additional shortcuts on the desktop -> Next
7) Setup Admin Password -> password padrão: "admin" -> Next
8) Processing -> Next
9) Instalação completa -> Quit
OBS:
- pode-se criar um diretório em Desktop para colocar os atalhos criados (por
questões de organização, já que são quatro ícones).
- o arquivo eXist-setup-1.2.4-rev80722.jar pode ser deletado após a instalação.
Para testar o programa:
- Clique no ícone eXist Database Startup criado no Desktop ou execute os comandos:
[root@localhost opt]# cd /opt/eXist/bin
[root@localhost bin]# ./startup.sh
- Em seguida, abra o navegador e coloque a URL: http://localhost:8080/exist
- Para sair, basta fechar o terminal.
OBS: se houver erro no navegador devido à conflito na porta 8080, ir em System >
Administration > Services, procurar o serviço na lista, selecioná-lo e clicar em
Stop. Possíveis programas que usam esta porta são o Oracle o Apache PHP.
-------3. JDK
-------- Faça o download do arquivo jdk-6u11-linux-i586-rpm.bin em (clicando no Download
de Java SE Development Kit (JDK))
http://java.sun.com/javase/downloads/index.jsp
Instalação:
- Dê permissão de execução para o arquivo. Clique com o botão direito sobre ele e,
em Propriedades > Aba “Permissions” > Selecione “Allow executing file as program.
[root@localhost Desktop]# ./jdk-6u11-linux-i586-rpm.bin
- Em seguida, crie um arquivo com o nome jdkconfig.sh com o seguinte conteúdo.
JAVA_HOME=/usr/java/latest
PATH=$JAVA_HOME/bin:$PATH
CLASSPATH=.:$CLASSPATH:$JAVA_HOME/lib
export JAVA_HOME CLASSPATH PATH
- Coloque este arquivo em /etc/profile.d
- Clique com o botão direito sobre ele
e, em Propriedades > Aba “Permissions” >
Selecione “Allow executing file as program.
- Em seguida, dê um duplo clique sobre ele e selecione “Run in terminal”.
OBS: o arquivo jdk-6u11-linux-i586-rpm.bin pode ser deletado após a instalação.
---------------------4. DB2 Express-C 9.5
---------------------- Disponível em (é preciso fazer cadastro para realizar o download)
http://www-01.ibm.com/software/data/db2/express/download.html
- É necessário ter o JDK instalado. Para saber como instalá-lo, veja Seção 3.
- Se você instalou o JDK agora, feche o terminal e abra-o novamente.
Instalação:
[root@localhost
[root@localhost
[root@localhost
[root@localhost
[root@localhost
Desktop]# mv db2exc_950_LNX_x86.tar.gz /opt
Desktop]# cd /opt
opt]# tar -xzvf db2exc_950_LNX_x86.tar.gz
opt]# cd exp
exp]# ./db2setup
Caso ocorra o erro:
ERROR:
The required library file libstdc++.so.5 is not found on the system.
Check the following web site for the up-to-date system requirements
of IBM DB2 9.5
http://www.ibm.com/software/data/db2/udb/sysreqs.html
http://www.software.ibm.com/data/db2/linux/validate
/opt/exp/db2/linux/install/../bin/db2usrinf: error while loading shared libraries:
libstdc++.so.5: cannot open shared object file: No such file or directory
/opt/exp/db2/linux/install/db2setup: line 101: [: -ne: unary operator expected
/opt/exp/db2/linux/install/../bin/db2langdir:
error
while
loading
shared
libraries: libstdc++.so.5: cannot open shared object file: No such file or
directory
/opt/exp/db2/linux/install/../bin/db2langdir:
error
while
loading
shared
libraries: libstdc++.so.5: cannot open shared object file: No such file or
directory
DBI1055E The message file db2install.cat cannot be found.
Explanation: The message file required by this
script is missing from the system; it may have been
deleted or the database products may have been loaded
incorrectly.
User Response: Verify that the product option containing
the message file is installed correctly. If there are
verification errors; reinstall the product option.
Instale a lib:
[root@localhost exp]# yum install libstdc++.so.5
Rode o comando novamente:
[root@localhost exp]# ./db2setup
Uma interface gráfica se abrirá.
1) Clique em Install a Product -> Install New
2) Welcome to DB2 Setup Wizard -> Next
3) Software License Agreement <Accept> -> Next
4) Select the installation type <Typical> -> Next
5) Select installation , response file creation, or both <Install DB2 Express
Version 9.5 on this computer> -> Next
6) Select the installation directory </opt/ibm/db2/V9.5> -> Next
7) Set user information for the DB2 Administration Server <escolher password:
geralmente coloco o mesmo do nome, ou seja, user=dasusr1, password=dasusr1> -> Next
8) Set up a DB2 instance <Create a DB2 instance> -> Next
9) Set user information for the DB2 instance owner <escolher password: geralmente
coloco o mesmo do nome, ou seja, user=db2inst1, password=db2inst1> -> Next
10) Set user information for the DB2 fenced user <escolher password: geralmente
coloco o mesmo do nome, ou seja, user=db2fenc1, password=db2fenc1> -> Next
11) Start copying files -> Finish
12) Setup has completed successfully -> Finish
Para testar o programa:
- Permitir que o usuário db2inst1 utilize o modo gráfico.
# xhost +
- Ir para a conta do db2inst1
# su db2inst1
- Iniciar o banco
$ db2start
- Abrir o centro de controle
$ db2cc
-----------------------5. Comandos Adicionais
-----------------------Para permitir a execução de um arquivo
- Clique com o botão direito sobre ele e, em Propriedades > Aba “Permissions” >
Selecione “Allow executing file as program.

